Gert Odendaal
AH legend
Our quest: A journey to cast steel- casting brass Martini Henry barrel rings
Good day to all members:
As mentioned in the .500 Jeffery building project , I need to find a method to enable me to cast my own steel rifle parts. My good friend Herman Nel shared this vision to find a method to cast our own steel rifle parts. We commenced on this journey the past week.
The method we currently employed was by using termite to cast our first experimental steel cast .
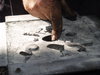
Preparations began by doing a sand cast of a box-lock black powder Derringer parts.


We commenced to measure the steel parts of the Derringer.

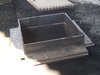
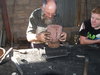
Herman prepared the sand casting box :


Firming up the sand from left to right with the hammer is important to ensure the sand and parts print do not move when joining the top cast box.

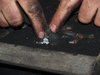
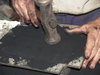
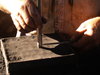
Pressing the steel pistol parts into the sand to create a duplicate print:

Taking out the parts carefully not to brake a piece out of the sand print and covering the steel parts with powder plaster of paris.


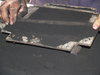
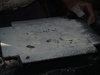
Covering the sand cast surface with fine powder of plaster of paris:

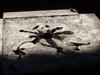
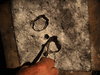
Taking out the steel parts and creating runners for the molten steel to flow in to the part prints in the sand:

The process is now completed and the lid is put onto the cast prints , the alignement is ensure by two steel rods threading through two holes to line up everything square.

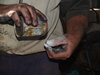
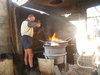
The second phase commence by measuring the amount of steel cut into pieces , flat bar and drop into the crucible that will contain the Termite. The melting process will commence when the Termite is ignited by a fuse to set the metal/Termite ablaze..2500 degrees is reached , the steel is melted and the Aluminium parted from the molting steel. The molten steel burns through a metal washer and enter into the cast following all the runners to fill the cast prints and create the steel parts we need.
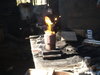
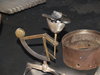
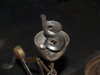
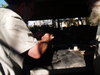
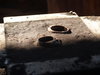
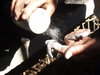
The crucible is positioned in the centre of the sand cast box :

The detonator is secured through a hole in the lid of the crucible , after the correct amount of mild steel pieces and the Termite is weighed ...

The igniter:

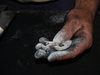
Steel and Termite is measured:

Wires are connected to the ignition box:

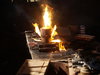
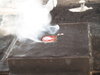
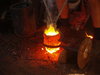
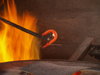
The melting process started:

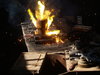
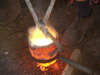
It increased into a volatile combustion reaching at least 2500 degrees Celsius.. the crucible exploded.

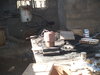
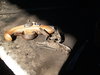
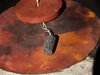
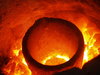
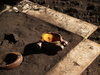
Meltdown:


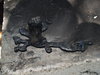
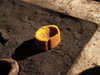
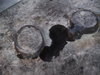
Cooling period:
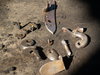
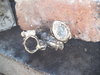
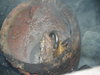
End result:

Conclusion:
We will be able to cast steel parts for the old rifles. We are currently refining the process. The melting process was not completed when the molten steel burned through the steel disk in the crucible. We will use a thicker steel disk to prolong the meltdown of the steel and Termite, ensuring the aluminum in the melt down separate from the steel ensuring pure steel will flow into the cast and the dros aluminium will drift on the surface since the aluminium is lighter than the steel.
I will give an update on our progress with this process..http://www.**NOT**PERMITTED**.co.za/forums/images/smilies/happy0065.gifhttp://www.**NOT**PERMITTED**.co.za/forums/images/smilies/thumb_up.gif
Good day to all members:
As mentioned in the .500 Jeffery building project , I need to find a method to enable me to cast my own steel rifle parts. My good friend Herman Nel shared this vision to find a method to cast our own steel rifle parts. We commenced on this journey the past week.
The method we currently employed was by using termite to cast our first experimental steel cast .
Preparations began by doing a sand cast of a box-lock black powder Derringer parts.
We commenced to measure the steel parts of the Derringer.
Herman prepared the sand casting box :
Firming up the sand from left to right with the hammer is important to ensure the sand and parts print do not move when joining the top cast box.
Pressing the steel pistol parts into the sand to create a duplicate print:
Taking out the parts carefully not to brake a piece out of the sand print and covering the steel parts with powder plaster of paris.
Covering the sand cast surface with fine powder of plaster of paris:
Taking out the steel parts and creating runners for the molten steel to flow in to the part prints in the sand:
The process is now completed and the lid is put onto the cast prints , the alignement is ensure by two steel rods threading through two holes to line up everything square.
The second phase commence by measuring the amount of steel cut into pieces , flat bar and drop into the crucible that will contain the Termite. The melting process will commence when the Termite is ignited by a fuse to set the metal/Termite ablaze..2500 degrees is reached , the steel is melted and the Aluminium parted from the molting steel. The molten steel burns through a metal washer and enter into the cast following all the runners to fill the cast prints and create the steel parts we need.
The crucible is positioned in the centre of the sand cast box :
The detonator is secured through a hole in the lid of the crucible , after the correct amount of mild steel pieces and the Termite is weighed ...
The igniter:
Steel and Termite is measured:
Wires are connected to the ignition box:
The melting process started:
It increased into a volatile combustion reaching at least 2500 degrees Celsius.. the crucible exploded.
Meltdown:
Cooling period:
End result:
Conclusion:
We will be able to cast steel parts for the old rifles. We are currently refining the process. The melting process was not completed when the molten steel burned through the steel disk in the crucible. We will use a thicker steel disk to prolong the meltdown of the steel and Termite, ensuring the aluminum in the melt down separate from the steel ensuring pure steel will flow into the cast and the dros aluminium will drift on the surface since the aluminium is lighter than the steel.
I will give an update on our progress with this process..http://www.**NOT**PERMITTED**.co.za/forums/images/smilies/happy0065.gifhttp://www.**NOT**PERMITTED**.co.za/forums/images/smilies/thumb_up.gif
Attachments
-
 P1010294_zpsn0f9g2yb-2.jpg168.1 KB · Views: 209
 -
 P1010307_zps7cxnlkek-2.jpg191.3 KB · Views: 235
 -
 P1010307_zps7cxnlkek.jpg191.3 KB · Views: 198
 -
 P1010298_zpsd2txhssu.jpg180.5 KB · Views: 197
 -
 P1010297_zpsocoj1zix.jpg197.3 KB · Views: 201
 -
 P1010310_zpsepi1tzv4.jpg252.7 KB · Views: 222
 -
 P1010294_zpsn0f9g2yb.jpg168.1 KB · Views: 205
 -
 P1010292_zpsvgfd8ktu.jpg213.2 KB · Views: 244
 -
 P1010220_zpszvxycaqh.jpg198.5 KB · Views: 225
 -
 P1010236_zpsjemy6ah8.jpg154.6 KB · Views: 212
 -
 P1010250_zpslhxi3tmj.jpg221.7 KB · Views: 229
 -
 P1010254_zpsxpgfb34i.jpg232.3 KB · Views: 196
 -
 P1010219_zps6pngxj1n.jpg115.6 KB · Views: 209
 -
 P1010209_zpsnenr65xd.jpg223.6 KB · Views: 222
 -
 P1010234_zpsbleklfyy.jpg208 KB · Views: 200
 -
 P1010231_zpsjsvdh3k1.jpg247.8 KB · Views: 196
 -
 P1010289_zpsala5vbom.jpg186.1 KB · Views: 205
 -
 P1010250_zpslhxi3tmj-2.jpg221.7 KB · Views: 198
 -
 P1010238_zpsjlunrmap.jpg202.8 KB · Views: 202
 -
 P1010290_zpsocxhxlnm.jpg156.6 KB · Views: 192
 -
 P1010204_zpsp30jr6sk.jpg199.7 KB · Views: 218
 -
 P1010239_zpsongxejvn.jpg199.6 KB · Views: 202
 -
 P1010215_zpsoy1hl2bx.jpg200.5 KB · Views: 258
 -
 P1010230_zpsmfvl5njo.jpg239.1 KB · Views: 241
 -
 P1010259_zps3w543ihd.jpg250.2 KB · Views: 218
Last edited by a moderator:


")